2.4. Jupyter Notebook#
The Jupyter Notebook system is a powerful tool for interactive coding and note-taking. Instead of using proprietary tools such as Tableau or Power BI, it is now common for data scientists to use Python and Jupyter Notebook to integrate many other tools for data science tasks.
2.4.1. Installing Jupyter Notebook#
Once you have a virtual environment, you can begin installing Python packages within it. For package installation, Python has a package manager pip (Pip Installs Packages). pip installs Python packages from the Python Package Index (PyPI) software repository, where Python developers publish and distribute packages.
In order to install a software package as part of the project environment, before you install the package, you need to first:
Change directory into your project folder, and
Activate the project virtual environment.
To install Python packages using pip in the project folder with a virtual environment activated, the syntax is:
pip install [PACKAGE_NAME]
To install Jupyter Notebook, you issue the command below with the virtual environment activated (with the (.venv) at the beginning of the command prompt), for example, issue the command as:
(.venv) PS C:\Users\[user]\workspace\dsm> pip install notebook
Collecting notebook
  Using cached notebook-7.4.5-py3-none-any.whl.metadata (10 kB)
Collecting jupyter-server<3,>=2.4.0 (from notebook)
...
...
(.venv) [user]@[host]ː~/workspaces/dsm$ pip install notebook
Collecting notebook
  Downloading notebook-7.2.2-py3-none-any.whl (10.5 MB)
Collecting jupyterlab-server!=2.10.0,>=2.3.0
  Downloading jupyterlab_server-2.25.1-py3-none-any.whl (58 kB)
...
...
2.4.2. Launch Jupyter#
To open a Jupyter Notebook, go to your project folder in PowerShell (Windows) or Terminal (macOS) CLI, and type the following command and press Enter (with the venv activated):
(.venv) PS C:\Users\[user]\workspace\dsm> jupyter notebook
(.venv) [user]@[host]ː~/workspaces/dsm$ jupyter notebook
This command will launch Jupyter Notebook in your default browser, along with a CLI that displays the Notebook server processes. When you launch Jupyter Notebook, it opens the Home page in your browser. Navigate the Jupyter Notebook Homepage, and you will see the URL “http://localhost:8888/tree ” in the address bar.

Fig. 2.6 A new Jupyter Home page#
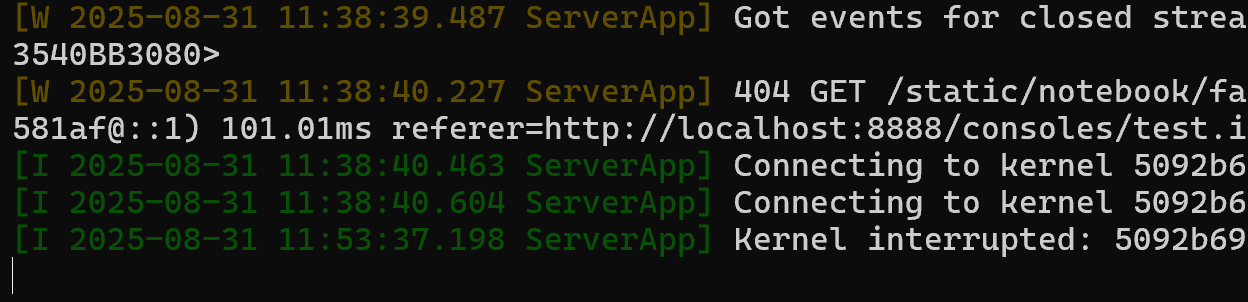
Fig. 2.7 The Jupyter Notebook server#
2.4.3. Create New Notebooks#
To create a new notebook, click the ‘New’ button on the upper right corner of the Jupyter Home page and select the desired Python environment (Python3 (ipykernel)). This will give you a new untitled notebook in a new browser tab. The new notebook will have a title called “Untitled” by the Jupyter sign at the top of the browser tab. To rename a notebook, click on the title (i.e., ‘Untitled’) and enter a new name, e.g., test. Do not remove the extension name.
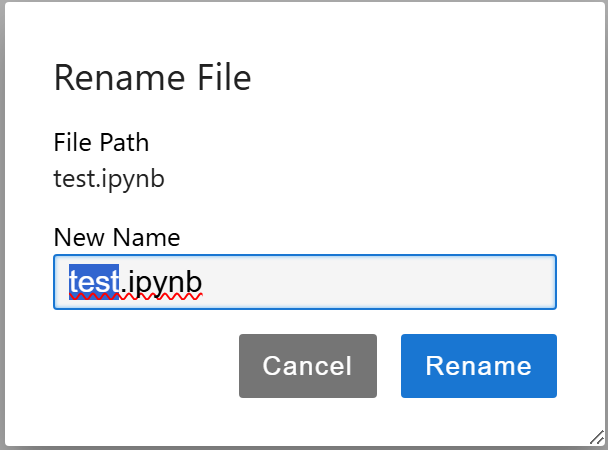
Fig. 2.8 Renaming a Jupyter Notebook#
After renaming the notebook, you can go back to the Jupyter Home tab and refresh the tab to see that Untitled.ipynb becomes test.ipynb.
2.4.4. Code Cells#
Jupyter Notebook uses code cells to execute Python code and markdown cells for notes. By default, a new cell is a code cell. For example, to print a message in our test.ipynb, you issue:
print("hello world")
hello world
You can highlight and execute a cell by clicking on the ‘Run’ icon or simply by using the keyboard shortcut Shift+Enter or Ctl+Enter. The output appears below the cell.
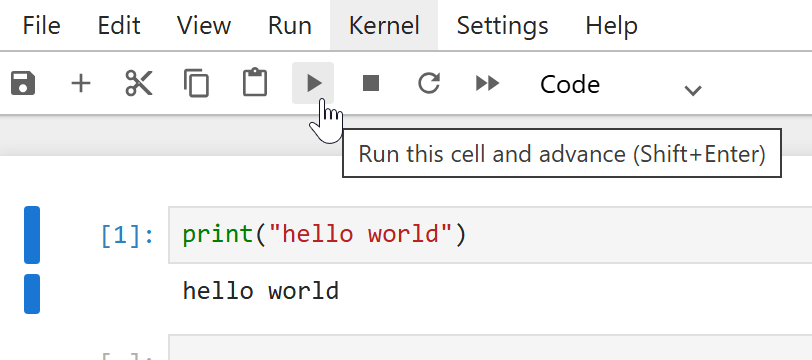
Fig. 2.9 Executing a code cell in Jupyter Notebook#
2.4.5. Markdown Cells#
Jupyter Notebook is called a “notebook” because it functions like a digital notebook: A document that combines “live code, equations, visualizations, and text in a single, shareable file format. For non-code text presentation, we use markdown cells. Markdown is a popular lightweight markup language that is a superset of HTML syntax, allowing for rich text formatting.
Let’s add a new cell by using the toolbar or the keyboard shortcut B. We can then use the Cell menu, the toolbar, or the key shortcut M to turn the highlighted code cell into a Markdown cell for notes. Note that Markdown cells are not executable, and we can format the text using Markdown syntax.
Markdown cells are useful for taking notes and support formatting such as headings, bold, italics, lists (itemized and enumerated), and even LaTeX for equations. You can use # to specify the heading levels (1-6):
# Heading Level 1 (H1)
## Heading Level 2 (H2)
### Heading Level 3 (H3)
For lists, use - and [number].; nested lists are also supported. For bold and italic, use double and single *.
2.4.6. Keyboard Shortcuts and Help#
Some keyboard shortcuts are handy when operating a notebook by streamlining your workflow.:
Shift+Enter: Runs the current cell and moves to the next cellCtl+Enter: Runs the current cell and stays in the current cellA: add a new cell above the current cellB: add a new cell below the current cellC: copy a cell/selected cellsX: cut a cell/selected cellsV: paste a copied cell/selected ceellsDD: delete the highlighted cell(s)Z: undo cell operationM: turn a code cell to Markdown cellY: turn a Markdown cell to a code cellCtl+Shift+ArrowUp/Down: Duplicate linesCtl+/: toggle comments
To show a list of shortcuts, go to the Help menu and choose “Show Keyboard Shortcuts” from the dropdown. The ‘Help’ menu also gives you access to documentation for libraries and the notebook itself.
2.4.7. Other Notebook Operations#
2.4.7.1. Saving and Exporting Notebooks#
You can save your notebook by clicking the save icon or pressing Ctrl+S. Jupyter Notebooks have an autosave feature that saves every two minutes.
To export your notebook, go to File > Download As and select your preferred format, such as .py (“Executable Script”) for Python scripts, PDF for documentation, or .html for web viewing.
2.4.7.2. Restarting and Interrupting the Kernel#
If you encounter an infinite loop or need to restart your Python environment, go to the ‘Kernel’ menu and select ‘Restart Kernel’ (0,0). This will reset the notebook’s kernel and stop any running code. You can also use ‘Interrupt’ (I,I) to stop a specific cell.
2.4.7.3. Shutdown and Deactivate#
To shut down Jupyter Notebook safely, you need to 1) shut down the notebooks kernels and close the tabs, 2) quit the Notebook server, and 3) deactivate the Python virtual environment.
Shutdown the notebook kernels and close the notebooks: First, save your work, then stop individual notebooks’ kernels from the Notebook UI (Kernel → Shutdown or Shutdown All Kernels). The can also be done from the Dashboard’s “Running” tab. After that, close the browser tabs.
Stop the Notebook server: Stop the server process at the Home page by doing File → Shut Down. Alternatively, this can be done by pressing Ctrl+C (confirm when prompted).
Finally, at the CLI, enter
deactivateto exit the active Python virtual environment.
2.4.8. Key Takeaways#
Jupyter Notebooks allow for interactive Python coding and note-taking in one environment.
Use PowerShell or Terminal to launch Jupyter Notebooks and navigate directories as needed.
Code cells execute Python code, while markdown cells are for formatted notes and documentation.
Keyboard shortcuts like Shift+Enter and A, B, DD to streamline workflow in notebooks.
Notebooks can be saved, exported, and kernels restarted or interrupted for troubleshooting.